Deprecated: str_replace(): Passing null to parameter #3 ($subject) of type array|string is deprecated in /home/dh_nq8y8a/culinarycreationsdaily.com/wp-content/plugins/all-in-one-seo-pack/app/Common/Traits/Helpers/Strings.php on line 129
- Daily Recipe Ideas

Top 10 International Dishes to Try at Home

Food is a universal language that transcends borders and cultures, bringing people together and offering a glimpse into different traditions and flavors. With travel restrictions in place, you might be craving some international culinary adventures. So, why not bring the world to your kitchen by experimenting with new dishes? Here is a list of top 10 international dishes that you can try creating at home, offering a delicious journey across the globe.

First, let’s transport you to the vibrant streets of Thailand with Pad Thai. This iconic dish is a perfect blend of sweet, sour, and salty flavors, combining rice noodles, shrimp or tofu, eggs, and a tangy sauce. It’s a one-pan wonder that’s both quick and easy to prepare, yet delivers an explosion of flavors that will tantalize your taste buds.

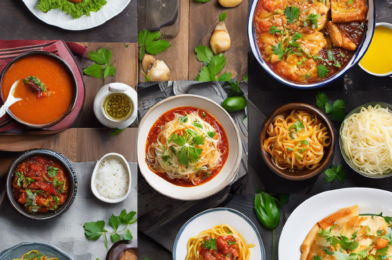
Now, we head to Italy, where a comforting bowl of pasta Carbonara awaits. This classic Roman dish showcases the beauty of simplicity, bringing together guanciale (cured pork cheeks), pecorino cheese, eggs, and black pepper in a rich and creamy sauce that coats thick spaghetti strands. It’s a heartwarming dish that embodies the essence of Italian cuisine.

Speaking of comfort food, let’s travel to the bustling streets of India and discover Butter Chicken, a rich and creamy curry. This dish marries tender pieces of chicken with a lush tomato-based sauce, flavored with a host of spices, including cumin, coriander, and turmeric. It’s best enjoyed with a side of steaming basmati rice or freshly baked naan bread to soak up every last drop of that delicious sauce.

For those craving something lighter and healthier, look no further than Japan’s Sushi. This dish has become a global phenomenon, and rightfully so. It showcases the freshest of fish and ingredients, carefully prepared and artfully presented. Making sushi at home may seem daunting, but with the right tools and fresh ingredients, you can create your own edible masterpieces.

These are just a few teases of the international dishes you can try. Other palate-pleasing options include France’s Beef Bourguignon, a hearty stew slow-cooked to perfection; Spain’s iconic and colorful Paella, a rice dish loaded with seafood, meat, and vegetables; Mexico’s ever-popular Taco, a fun and versatile handheld treat; Morocco’s Tagine, a slow-cooked stew of meat and vegetables infused with cumin and cinnamon served with couscous; and finally, Vietnam’s iconic Pho, a comforting rice noodle soup with a fragrant broth.

So, roll up your sleeves, grab your passport (well, metaphorically), and get ready to embark on a culinary journey like no other. Happy cooking and bon appétit!

(Note: Feel free to include your own introductory image and any other visuals to enhance the article’s appeal. This piece aims to provide an engaging and informative guide to exciting international dishes readers can attempt at home.)
How to Make Homemade Ice Cream

Making homemade ice cream is a delightful treat and a fun project for all ages. It’s a perfect summer activity and a delicious way to cool off during those hot days. While it may seem intimidating, making ice cream at home is a simple process that yields creamy and flavorful results. The best part? You likely have all the necessary ingredients in your kitchen already!

So, where do you start? The base of any good ice cream begins with a combination of milk, cream, and sugar. For a classic vanilla ice cream, you’ll want to use a ratio of 1 part milk to 2 parts heavy cream, ensuring a rich and creamy texture. Heat the milk, cream, and sugar in a saucepan until the sugar dissolves, then remove it from the heat and let the mixture cool. This simple custard base is the foundation of your ice cream, and from here, the flavor possibilities are endless!

Once your base is ready, it’s time to get creative. For vanilla ice cream, add a teaspoon of pure vanilla extract to your cooled custard. If you’re feeling adventurous, experiment with other flavors like fresh mint, lemon zest, or cocoa powder. The key to achieving the perfect flavor is to add your ingredients gradually, tasting as you go, to ensure the balance is just right. You can also throw in add-ins like chocolate chips, nuts, or fresh fruit for a more indulgent treat.

The next step is crucial: chilling the mixture. This step is often overlooked but ensures a smooth and creamy texture. Churning warm custard will result in icy ice cream, so be sure to chill your base for at least 4 hours, or even overnight if possible. This step may seem tedious, but it’s well worth the wait for that perfect ice cream shop texture.

Now it’s time to churn! If you’re using an ice cream maker, simply pour your chilled custard into the machine and let it work its magic. Churn according to your machine’s instructions, usually around 20-30 minutes, until you achieve a soft-serve consistency. If you don’t have an ice cream maker, don’t fret! You can still make ice cream at home by hand.

To make ice cream without a machine, pour your mixture into a shallow tray and place it in the freezer. Every 30 minutes, remove the tray and give it a good stir to break up any ice crystals forming. Repeat this process for 2-3 hours, or until your ice cream is thick and creamy.

Once your ice cream has reached the desired consistency, transfer it to an airtight container and pop it into the freezer to firm up. This step is important to ensure your ice cream is scoopable and ready whenever that ice cream craving hits.

Making homemade ice cream is a delightful way to impress your friends and family, and it’s a fun project to do with kids. Experiment with different flavors, textures, and add-ins, and you’ll be well on your way to becoming an ice cream connoisseur. So, what are you waiting for? It’s time to get churning!

The Best Gluten-Free Recipes for Every Meal

Eating gluten-free has become increasingly popular, whether it’s due to allergies, intolerances, or personal preference. Thankfully, there are endless tasty options to choose from for breakfast, lunch, dinner, and dessert!

For a delicious start to your day, try whipping up some gluten-free pancakes. Simply combine gluten-free flour, baking powder, salt, and a touch of sugar with eggs, milk, and vanilla extract. Fry up these fluffy treats and top with fresh berries and maple syrup for a decadent, gluten-free breakfast. If you’re on the go, a gluten-free yogurt bowl with granola and fruit is a quick, healthy option. For lunch, a vibrant salad with quinoa, roasted vegetables, and a tangy vinaigrette dressing is a nourishing choice. Alternatively, satisfy your soup cravings with a hearty bowl of gluten-free minestrone, packed with beans, vegetables, and gluten-free pasta.

As dinnertime rolls around, a hearty gluten-free chili con carne is a perfect option. Filled with ground beef, beans, and a rich tomato sauce, it’s a comforting and flavorful meal. For a lighter choice, bake a fillet of salmon with a crunchy gluten-free herb crust, served with roasted vegetables and wild rice. If you’re craving comfort food, gluten-free chicken pot pie is a delicious, hearty option, with a creamy sauce and a crispy, gluten-free pastry topping.

Now, who can resist a sweet treat to end the day? For dessert, indulge in a rich and fudgy gluten-free brownie, or try a fruity option like a warm apple crumble, served with creamy gluten-free ice cream. For a refreshing choice on a hot day, go for a creamy gluten-free lemon posset, a traditional British dessert with a tangy twist.

With so many tasty options, eating gluten-free is far from boring! These recipes are sure to satisfy any craving and cater to a wide range of taste preferences. So, get cooking and enjoy exploring the delicious world of gluten-free dining! It’s easier and more delicious than you might think.

Remember to stock your pantry with gluten-free essentials like certified gluten-free oats, a variety of gluten-free flours, and maybe even some gluten-free breads and pastas. This way, you’ll always be prepared to whip up something delicious, no matter the meal! Bon appétit, gluten-free style!

How to Host a Dinner Party: Menu Ideas and Tips

Hosting a dinner party can be a delightful way to bring friends and family together, create lasting memories, and express your creativity. But it can also be a daunting task, especially if you’re new to the world of entertaining. Fear not, as with the right menu and a few handy tips, you’ll be well on your way to hosting a memorable gathering that your guests will talk about for years to come!

When planning your menu, it’s important to consider the season and what ingredients are fresh and readily available. For instance, a crisp autumn evening might call for a hearty stew or a roasted vegetable salad, while a summer dinner could feature a light pasta dish with fresh herbs and a fruity dessert. Think about a theme and build your menu around it. It could be a specific cuisine, such as Italian or Thai, or a fun concept like a ‘build-your-own’ bar with various toppings and fillings. This makes the planning process easier and adds a unique twist to your dinner party.

Keep in mind that not all your guests may have the same dietary preferences or restrictions. Be mindful of common dietary needs, such as vegetarian, vegan, gluten-free, or dairy-free options, and plan your menu accordingly. This ensures that everyone feels included and well-fed during the party. Offer a variety of dishes with different flavors, textures, and colors to make your spread exciting and appealing. Include a balance of light and indulgent options so that guests can sample a little of everything without feeling too full too quickly!

Now, let’s talk about portions. You don’t want your guests to leave hungry, but you also don’t want to be stuck with mountains of leftovers. A good rule of thumb is to plan for slightly more than you think you’ll need, taking into account the number of guests and the number of dishes you’re serving. For example, if you’re serving a multi-course meal, smaller portions for each course will allow your guests to enjoy the entire meal without feeling overwhelmed.

Presentation is key to elevating your dinner party experience. Use interesting plates, bowls, and serving ware to showcase your dishes. Garnish with fresh herbs, edible flowers, or colorful spices to add a touch of elegance. Remember, we eat with our eyes first!

Timing is critical to the success of your dinner party. Prepare as much of the food ahead of time as possible so you’re not stuck in the kitchen while your guests arrive. Dishes that can be made in advance and reheated or assembled quickly are ideal. On the day of the party, create a timeline and work backward, allowing enough time for cooking, setting up, and, most importantly, yourself to get ready!

Finally, don’t forget to enjoy yourself! Your guests will feed off your energy, so relax, smile, and remember that they are there to enjoy your company as much as the food. With these tips and a well-planned menu, you’ll be on your way to hosting memorable dinner parties that leave your guests impressed and satisfied.

Top 5 Slow Cooker Recipes for Busy Days

The slow cooker is a busy person’s best friend, and it’s time to put this handy kitchen appliance to work! With just a bit of preparation, you can have a delicious, comforting meal ready and waiting for you at the end of a busy day. So, here are five fantastic slow cooker recipes that will become your go-to staples when you’re short on time but crave a hearty, homemade dinner.

First up is a classic: savory pot roast. Simply season a chuck roast with salt and pepper, sear it in a hot skillet, and then place it in your slow cooker. Add in some chopped onions, garlic, carrots, and celery, along with a bay leaf and a splash of red wine. Let it cook low and slow for 8–10 hours, and you’ll have tender, flavorful meat that falls apart at the touch of a fork. Serve it with mashed potatoes and gravy made from the delicious juices in the slow cooker, and you’ve got a winning weeknight dinner.

Chicken tortilla soup is another great option for your slow cooker repertoire. This recipe couldn’t be easier—just add boneless, skinless chicken breasts, canned diced tomatoes, chopped onions, garlic, black beans, corn, and chicken broth to your slow cooker. Season with chili powder, cumin, and a hint of cayenne for a kick. Cook on low for 6–8 hours, and then shred the chicken with a fork before serving. Top with crispy tortilla strips, avocado slices, and a dollop of sour cream for a tasty, satisfying meal.

Who doesn’t love a good old-fashioned macaroni and cheese? This comfort food favorite can also be made in your slow cooker! Simply combine uncooked macaroni, shredded cheddar and mozzarella cheeses, evaporated milk, butter, flour, and seasonings in your slow cooker, and let it cook on low for 3–4 hours. You’ll be greeted with a creamy, dreamy mac and cheese that’s perfect for busy days when you need a quick and easy dinner solution.

For a healthier option, try making pulled BBQ chicken sandwiches in your slow cooker. Place boneless, skinless chicken breasts in the cooker, and cover with your favorite BBQ sauce, a bit of ketchup, mustard, vinegar, and Worcestershire sauce. Add in some diced onions and garlic for extra flavor. Cook on low for 6–8 hours, and then use two forks to shred the chicken directly in the sauce. Serve on toasted buns with coleslaw and crispy fries for a delicious, family-friendly meal.

Lastly, warm up chilly evenings with a hearty beef stew. Cut beef chuck into cubes and sear in a skillet before adding to your slow cooker. Toss in chopped potatoes, carrots, onions, celery, and garlic, along with a bay leaf and some fresh thyme. Pour in enough beef broth to cover everything, and then let it simmer away for 8–10 hours until the meat is tender. Thicken the stew with a cornstarch slurry if needed, and serve with a crusty loaf of bread for a cozy, comforting meal.

So, there you have it—five fantastic slow cooker recipes to save the day when you’re short on time. With just a bit of advance preparation, you can enjoy delicious, homemade meals that will fuel you through your busy schedule. Happy cooking!

Remember to adapt the seasoning and ingredients to your taste preferences, and feel free to add or omit ingredients to cater to your dietary needs or preferences. Slow cookers are incredibly versatile, so don’t be afraid to experiment and find your signature slow cooker recipes!

How to Make Traditional Italian Pizza

Pizza è un piatto amato in tutto il mondo, ma pochi possono eguagliare il gusto e la qualità di una tradizionale pizza italiana. La pizza italiana è nota per la sua crosta sottile e croccante, gli ingredienti freschi e i sapori semplici ma deliziosi. Se vuoi provare a fare una pizza tradizionale italiana a casa, ecco una guida passo passo per ottenere risultati perfetti.

Prima di tutto, è fondamentale utilizzare le giuste farine per creare la base perfetta. La farina “00”, tipica della pizza napoletana, è la scelta migliore; ha una consistenza fine e setosa che dona alla pasta elasticità e morbidezza. Creare l’impasto è un’arte: bisogna mescolare la farina con acqua tiepida, lievito, un pizzico di sale e un po’ di zucchero per attivare il lievito. Impastare bene fino ad ottenere un panetto liscio ed elastico, da lasciar lievitare per almeno un’ora.

Mentre l’impasto lievita, è il momento perfetto per preparare il sugo di pomodoro. Anche qui, la semplicità è la chiave: basta scaldare un po’ d’olio d’oliva, aggiungere dell’aglio tritato e poi della polpa di pomodoro fresca, meglio se San Marzano. Lasciare cuocere lentamente per circa mezz’ora, aggiungendo basilico fresco a fine cottura per un sapore più intenso.

Una volta lievitato l’impasto, è tempo di stenderlo. Questo è un passo delicato: bisogna creare un cerchio sottile, stendendo la pasta con le dita dal centro verso l’esterno, senza però renderlo troppo sottile ai bordi per non perdere la consistenza croccante. Dopo aver steso la pasta, è il momento di aggiungere il sugo di pomodoro, distribuitelo uniformemente lasciando un bordo di un paio di centimetri.

The Best Smoothie Recipes for a Healthy Boost

Smoothies: a convenient, delicious, and nutritious way to fuel your body. Whether you’re looking for a quick breakfast on-the-go or a refreshing afternoon pick-me-up, blending together a few simple ingredients can create a tasty treat that packs a nutritional punch.

So, what are the best smoothie recipes for a healthy boost? First, let’s talk about the base. Frozen bananas are a great starting point as they add a creamy texture and natural sweetness. From there, you can add a variety of fruits and vegetables, each bringing their own unique nutritional benefits to the blend. For example, leafy greens such as spinach or kale are nutrient-dense and provide a good source of vitamins and minerals, while berries are packed with antioxidants and give your smoothie a beautiful burst of color.

Don’t be afraid to get creative and experiment with different combinations. For a tropical twist, blend bananas, mango, and a pinch of turmeric for an anti-inflammatory boost. Or, try a green smoothie with spinach, banana, and peanut butter for a protein-rich snack that will keep you satisfied. If you’re looking for something more refreshing, blend together cucumber, mint, and pineapple for a hydrating and revitalizing drink.

While fruit provides a natural source of sweetness, you can also add dates or a drizzle of honey for an extra touch of sweetness. Additionally, healthy fats such as avocado, nuts, or seeds can be added to create a more balanced and filling smoothie. These ingredients not only add flavor and texture but also help to keep you full and energized throughout the day.

Smoothies are also a great way to sneak in some extra nutritional boosts. Try adding a scoop of your favorite protein powder, chia seeds for some added crunch and fiber, or a spoonful of ground flaxseed for a dose of healthy omega-3 fatty acids.

When it comes to liquids, there are many options to choose from. Dairy milk, nut milk, coconut milk, or even fruit juice can be used, depending on your preference and dietary needs. You can even add a splash of coffee or matcha powder for a caffeinated kick.

The possibilities are endless, and with a few simple ingredients, you can create delicious and nutritious smoothies that will leave you feeling energized and ready to take on the day. Blend, sip, and enjoy!

How to Cook the Perfect Steak Every Time

Preparing a perfect steak is an art form, one that can be mastered with a few simple tips and tricks. Although it may seem daunting, cooking steak to perfection is a straightforward process that will impress your family and friends. Whether you prefer a rare, juicy center or a more well-done steak, achieving that perfect result is easier than you think. So, fire up the grill and get ready to become a steak-grilling master.

First, choose the right cut of steak. This is crucial to ensuring a tasty result. Go for a cut with good marbling, which is the amount of fat interspersed in the meat. Marbling adds flavor and keeps the steak moist during cooking. Prime grades of beef have the most marbling, but they can be expensive. Choice grades are a more affordable option with still-excellent marbling. Look for ribeye, strip steak, or tenderloin cuts, which are known for their exceptional flavor and texture.

Once you’ve chosen your steak, it’s important to bring it to room temperature before cooking. Take it out of the fridge 30-60 minutes beforehand and let it rest on the counter. This simple step ensures a more evenly cooked steak. While your steak is coming to room temperature, prepare your seasonings. A good rule of thumb is to keep it simple. Steak has a wonderful flavor on its own, so a generous sprinkle of salt and pepper is often all you need. Feel free to add other seasonings like garlic powder, paprika, or rosemary if you want to enhance the flavor further.

Now it’s time to cook! For the perfect steak, you’ll want to use a two-step cooking process, starting with searing. Heat up a cast-iron skillet or grill to a high temperature. Once it’s scorching, add a drizzle of oil and carefully place your steak in the pan. Sear for about 2-3 minutes on each side, until a golden-brown crust forms. This step locks in the juices and creates a delicious exterior. After searing, transfer the steak to an oven preheated to 350°F (180°C). Cook for an additional 5-10 minutes, depending on your desired doneness.

For a rare steak, aim for an internal temperature of 135°F (57°C), or let it reach 145°F (63°C) for medium-rare. If you prefer your steak more well-done, cook it to 160°F (71°C) for medium-well. Let the steak rest for 5 minutes before slicing, allowing the juices to redistribute. This ensures a juicy bite every time.

Holding a perfectly cooked steak in your hands, you’ll marvel at the delicious sear, the juicy interior, and the mouthwatering aroma. Savor this moment, and remember that with a few simple techniques, you, too, can become a master steak chef. Impress your guests, indulge your taste buds, and enjoy the fruits of your labor—the perfect steak, cooked to perfection, is now within your grasp. Bon appétit!

With these tips in your arsenal, you’re well on your way to becoming a steak-grilling aficionado. Remember to choose a well-marbled cut, let the steak come to room temperature, keep seasonings simple, and use a two-step cooking process. With a little practice, you’ll be grilling steaks that rival those at high-end steakhouses. Don’t be surprised if your friends and family start requesting your steak nights more often! So, get grilling, and enjoy the fruits of your labor—the perfect steak awaits.

Top 10 Desserts to Satisfy Your Sweet Tooth

Satisfying that sweet tooth is an art, and with so many dessert options, it’s a delicious journey of discovery. Whether you’re a self-proclaimed foodie or just have a hankering for something sugary, here’s a list of the top 10 desserts that are sure to hit the spot.

First up is the classic: apple pie. This all-American dessert is a comforting blend of sweet and tart, with a flaky pastry crust that just begs to be à la mode. Speaking of classics, you can’t go wrong with a good old-fashioned chocolate chip cookie. But why not take it up a notch with a warm, gooey chocolate chip skillet cookie, fresh from the oven and topped with a scoop of vanilla ice cream? It’s a dessert that brings people together and is perfect for sharing (or not!).

For something a little more sophisticated, try a creamy, rich cheesecake. New York-style is the classic, but there are countless variations to explore, from fruity swirls to chocolate-covered creations. If you’re feeling extra indulgent, go for the ultra-decadent Japanese cotton cheesecake, which has a light-as-air texture that melts in your mouth. Another dessert that showcases texture is the French silk pie, with its smooth and airy chocolate mousse filling and crisp crust.

Sometimes, only chocolate will do, and in that case, nothing beats a fudgy, rich brownie. For an extra treat, top it with a dollop of whipped cream and some fresh berries. While we’re on the topic of berries, a mixed berry cobbler is a must-try. This dessert is a celebration of summer, with warm, bubbling berries and a crumbly topping that makes it the perfect comfort food.

If you’re craving something creamy and frozen, gelato is the way to go. This Italian treat has a more intense flavor and silkier texture than ice cream, and with so many flavors to choose from, you’ll never get bored. Finally, for a truly elegant dessert, indulge in a crème brûlée. That first crack of the caramelized sugar topping, revealing the creamy custard beneath, is a sensory experience like no other.

There you have it—a sweet journey through some of the most delightful desserts out there. Remember, life is short, so satisfy that sweet tooth whenever you can!

The Secrets to Making Perfect Sushi at Home

Making perfect sushi at home may seem like a daunting task, but with the right techniques and ingredients, anyone can become a sushi master in their own kitchen. Sushi is a delicate and precise culinary art that has become incredibly popular worldwide. While it may seem easier to leave it to the pros and order takeout, the satisfaction of crafting your own sushi rolls at home is well worth the effort. So, get ready to impress your taste buds and your guests by discovering the secrets to making perfect sushi at home.

First and foremost, the key to success lies in the rice. Sushi rice is specifically shaped to be sticky and provide the perfect base for your rolls. When cooking the rice, be sure to follow the package instructions precisely, as the water-to-rice ratio and cooking time are critical to achieving the desired sticky texture. Once cooked, season the rice with a simple mixture of rice vinegar, sugar, and salt. This step is crucial, as it adds flavor and balances the natural starchiness of the rice. Be gentle when mixing the seasoning into the rice, using a folding motion to avoid mashing the grains.

The next secret to success is in the choice and preparation of fresh ingredients. Sushi-grade fish is an absolute must, and it’s important to source it from a reputable supplier. Look for fish that is specifically labeled ‘sushi-grade’ to ensure it has been properly handled andfrozen to eliminate parasites. In addition to fish, explore the variety of ingredients that can be used in sushi, such as avocado, cucumber, crabsticks, and tofu. Always opt for fresh, high-quality produce to ensure the best taste and texture.